Version 1.5.0
Scarlett Pay
Download Notes
Scarlett Pay
Release Notes
Download Notes
Version 1.5.0
Scarlett Pay
Download Notes
Scarlett Pay
Release Notes
Download Notes
1. Instructions for Bulk Import Queue
Commissions/Invoices
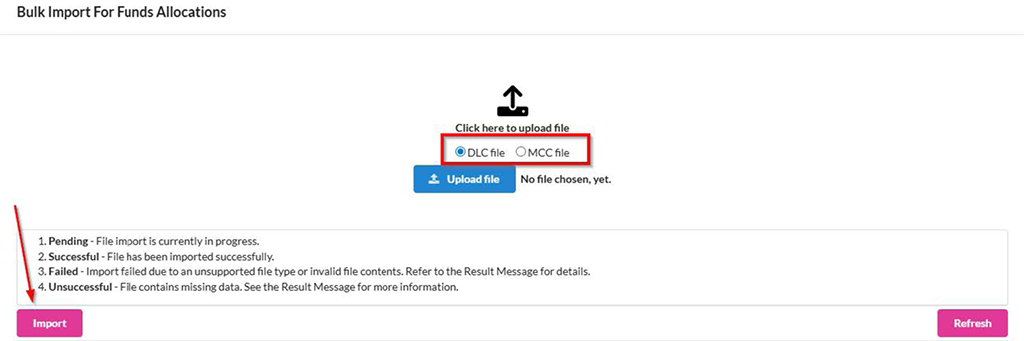
If you’re using the DLC or MCC templates for bulk allocations, please follow the updated steps below:
- Create the receivable as usual.
- Click the Allocations icon, then go to New Allocations > Bulk Allocation.
- In the pop-up window, select Import Allocation.
- Choose the appropriate template format (DLC or MCC) and upload your Excel file.
- Click Import.
Commissions/Invoices
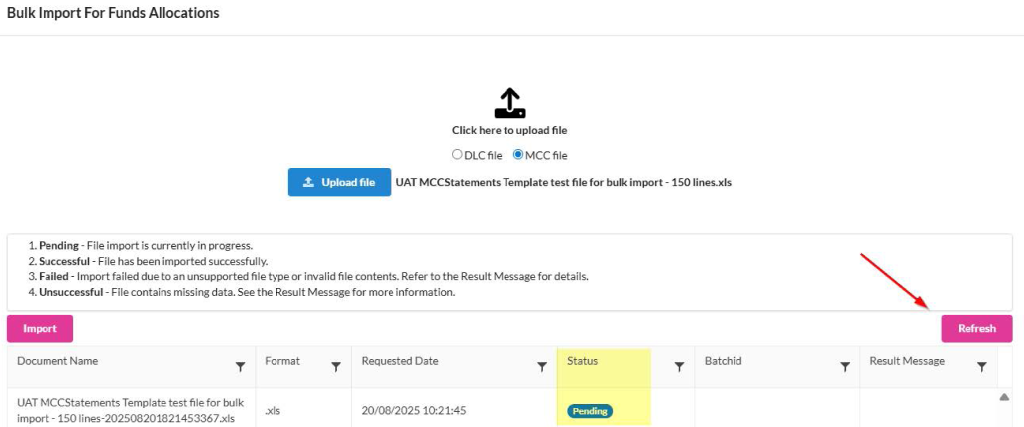
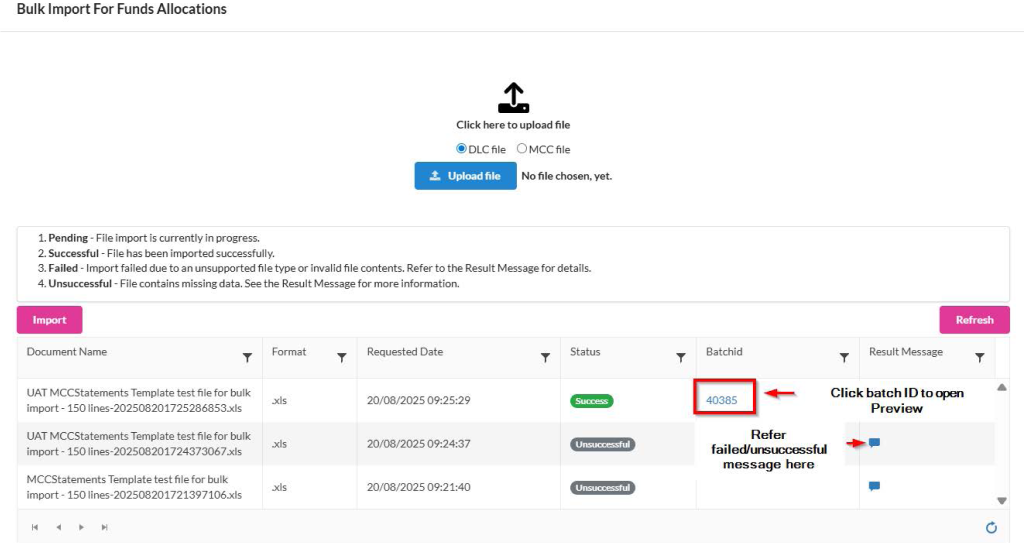
Import Status
The system will display a status depending on the import process.
- Pending: Click Refresh to update the status.
- Unsuccessful/Failed: Check the result message for specific error details.
- Success: Click on the Batch ID to review the import in the preview window before finalizing the allocations.
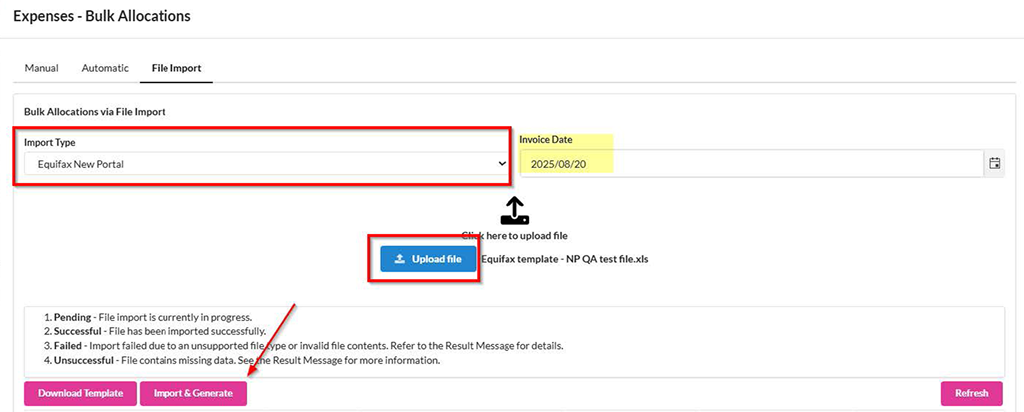
Expenses
Uploading Equifax New Portal Template
- Go to New Expense > Bulk Allocation > New Bulk Allocation.
- Select File Import.
- From the Import Type dropdown, choose Equifax New Portal, and provide the invoice date.
- Upload the Excel file and click Import & Generate.
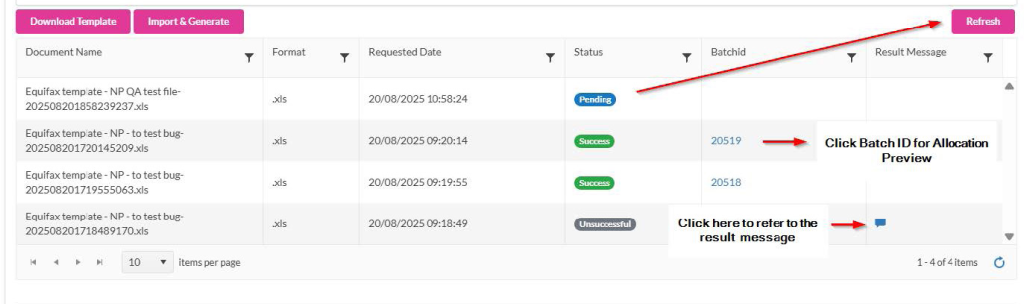
Expenses
Import Status
Depending on the status of the import a status will appear
- Pending: Click Refresh to update the status.
- Unsuccessful/Failed: Check the result message for specific error details.
- Successful: Click on the Batch ID to review the import in the preview window before finalizing the allocations.
Expenses
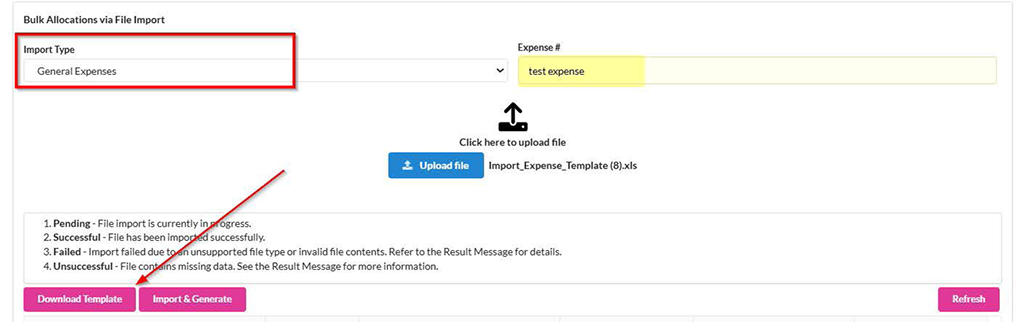
Uploading General Expenses Using the Template:
- Go to New Expense > Bulk Allocation > New Bulk Allocation.
- Click Download Template and fill in the required expense information.
- Choose General Expense from the Import Type dropdown.
- Enter the expense number and upload the completed file.